Pyramid's in memory database (IMDB) can be used as a data source, allowing you to build a data flow based on data models that were previously built in Pyramid and loaded into an IMDB target.
Pyramid's In-memory database can also be used as a Target data source when building data flows. Click here to learn how to connect to IMDB as a target.
Tip: Pyramid Discover Reports and Tabulate spreadsheets can also be used as data sources. Click here for more information.
Connect to Pyramid IMDB as a Source
The process for connecting to IMDB as a source is the same as that for connecting to relational databases.
Before you Begin
Before you begin this configuration process, you need to drag the In Memory node from the Elements panel (to the left) onto the canvas.
Step 1: Configure the In-Memory Source
Select the In Memory node on the canvas (purple arrow below) and then use the options at the top of the Properties panel (blue highlight) to define the source:
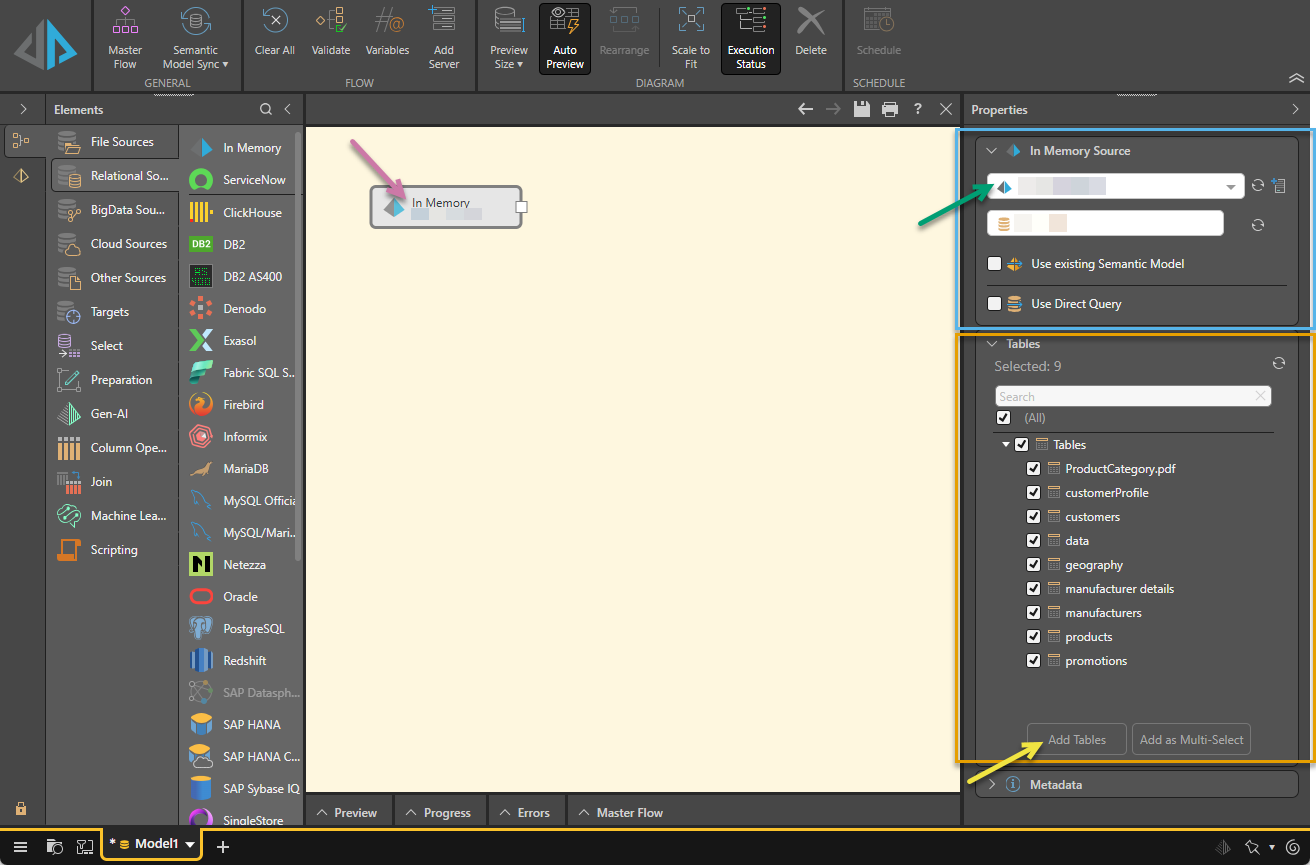
Server
From the first dropdown list in the Properties panel (green arrow), select your required server.
Note: If your server doesn't appear in the list, try clicking Refresh. If you are an Admin, you can configure additional servers in this view by clicking the Add Server button.
Database
From the next dropdown list, select your required database.
Note: If the database isn't listed, try refreshing this list.
Data Model Options
Choose how to access Pyramid data using one of the following checkboxes:
- Use Existing Semantic Model: Select this checkbox and then choose an existing semantic model from the relevant dropdown list. The semantic model can then be used to build a new model, allowing users to build data models without having access to the underlying data source. For more information, see Use Existing Semantic Model.
- Use Direct Query: Select this checkbox to enable direct querying and then progress immediately to Data Modeling. However, if you want to create a flow diagram and apply data cleansing, or simply don't want to allow direct querying of the model, do not enable direct querying. For more information, see Direct Query vs Ingested Data.
Step 2: Table Selection
From the Tables panel (orange highlight above), select those tables that you want to copy into the new data model. Table selection is relevant for both direct querying and data ingestion.
Tip: Click Refresh to ensure the list of tables is up to date and use the Search field to search for tables.
Add Tables to the Data Flow
Once you've selected the required tables, you'll need to add them to the data flow (unless you've enabled direct query):
- If you need to apply data cleansing, transformations, or machine learning, click Add Tables (yellow arrow) to copy the selected tables. Each table is copied into its own table node, where you can apply functions and formulations independently.
-
If you don't plan to apply data cleansing or transformations, use Add as Multi-Select to copy all selected tables into a single node that connects directly to the target.
Note: If you have enabled direct query, the Add buttons are disabled, as no nodes can be connected to a source designated for direct query.
Tip: Alternatively, you can add tables from the source to the data flow by dragging Select functions onto the canvas. You can then input the columns for each select operation. Another option is to use the Query node to copy a data set from the source using an SQL or SOQL expression. For more information, see Select.
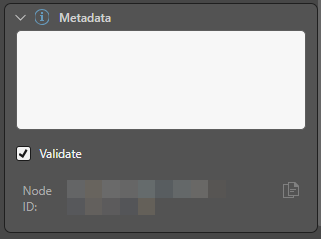
Step 3: Define Metadata
Expand the Metadata panel and add metadata details as required.
Description
Add a description for this node. This is useful for keeping track of the Data Flow (ETL) process, especially if multiple users are working with the same Data Flow. The description is visible only in the Model app.
Validate
If you do not want to validate this node when you run the validation process, for example because it is under construction and temporarily contains some invalid scripting, you can clear the selection of the Validate checkbox. Recommended: Always leave the Validate checkbox selected.
Node ID
The unique ID for this node. Click the Copy icon to copy this ID to your clipboard.
Example Configurations
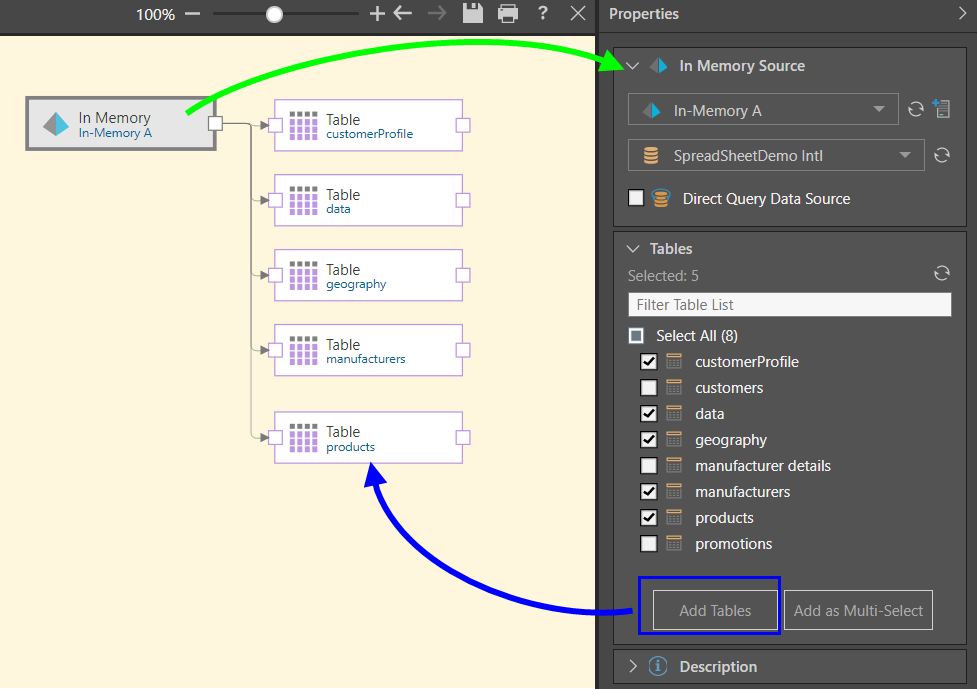
In this example, the user connected to an IMDB server that was configured in their system as In-Memory A, and connected to a database on that server called SpreadSheetDemo Intl (green arrow below).
Five tables from the given database were then selected and copied to the data flow using the Add Tables function, connecting each chosen table to the data source through a separate node (blue arrow).
The user can now connect any required functions or machine learning to the tables.
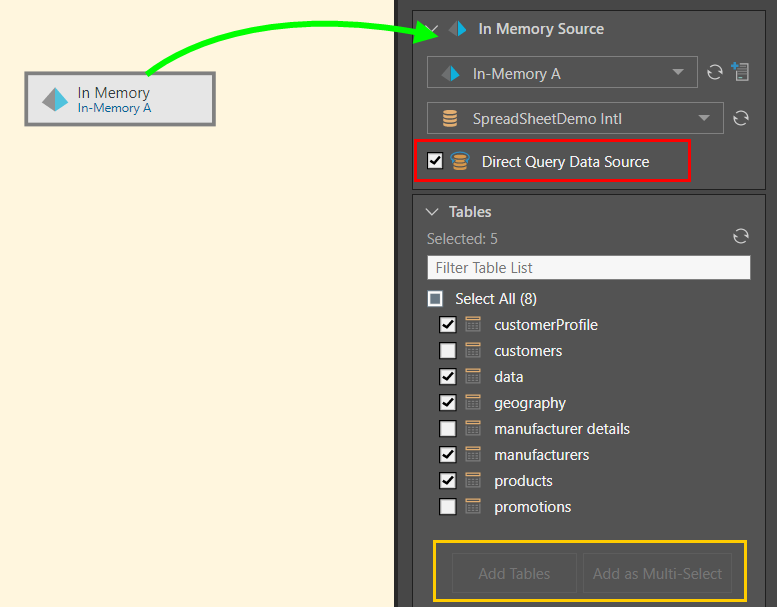
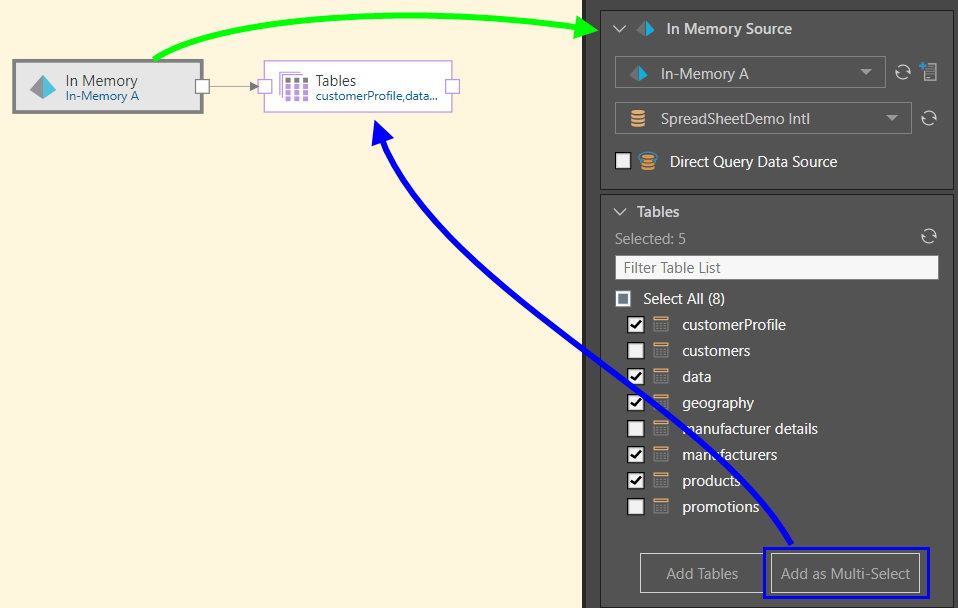
Here, the IMDB node was connected to the in-memory server called In-Memory A, and to a database on that server called SpreadSheetDemo Intl (green arrow below).
Five tables were selected from the given database and copied to the data flow using the Add as Multi-Select function, connecting each chosen table to the data source through a single multi-select node (blue arrow). Only a target node may be connected to the multi-select Tables node.
Here, the IMDB node was connected to the in-memory server called In-Memory A, and to a database on that server called SpreadSheetDemo Intl (green arrow below). Direct query was enabled (red highlight), disabling the Add functions in the Tables window (orange highlight). The user then selected 5 tables from the given database, so that only these given tables can be queried.
The user cannot connect any functions or nodes to the source node, because direct query is enabled.